Pages

Saturday, December 29, 2012

Canon Rebel T3i - What Are All These Buttons and What Do They Do?


With a DSLR cameras, you have at your fingertips much more options to choose from to help you get the perfect shot. A better camera doesn't necessarily means that you will automatically take better pictures. You need to understand all the functionality and the capability of your camera in order for you to maximize the quality of your images.

So I'm going to briefly going over the buttons on the Canon Rebel T3i. The first time I got my hands on it, it was a bit intimidating trying to figure out what is what and if you are like me, you probably won't look at your manual, lol, but figure things out through trial and errors.

Even though you don't have this particular model, I think most Canon DSLR cameras have very similar buttons. In future posts, I will go a bit more in depth with the camera settings and give you tips I learned.

On/Off - This is pretty self-explanatory and use to turn on or off your camera.
Shooting Mode - Each of these shooting modes serves as a purpose and you typically would pick the one that works best for you.
DISP. - To turn on and off the display on your LCD screen. I rarely touch this button so I don't know what else it does beside that.
ISO - use this button to select your ISO based on your lighting and camera settings. I use this a lot.
Left/Right Scroll - This is to mainly move your selection left or right on your menu screen.
Shutter - press half way to allow your camera to focus and then completely to take the shot.


MENU - To access your camera's menu
INFO. - gives you several options on what info you want to display your LCD screen
LCD/View Finder Display - allows you chose to view on your LCD screen or through the view finder.
Exposure Lock - I haven't quite played with this feature but it is supposed to lock the exposure on a certain area and allow you to recompose the image and keep that exposure the same. This button will also allow you to zoom out from a picture during preview.
Auto Focus Point Selector - choose which points you want in focus or this can also be used to zoom in our pictures during preview.
AV - allows you to select the aperture
Quick Menu - allows to change some settings quickly without having to go through the MENU.
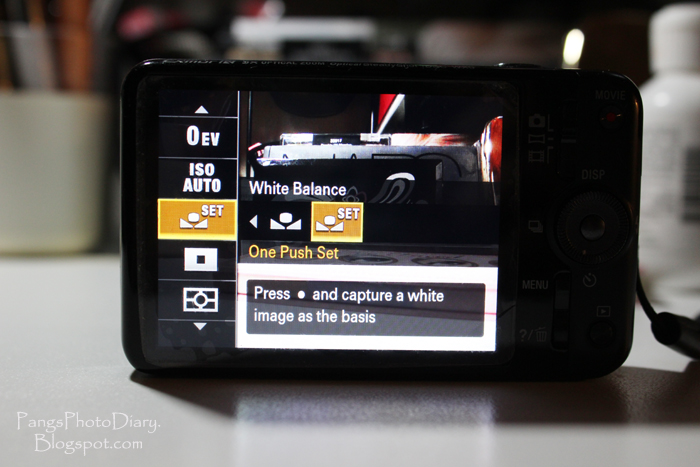
WB - allows you to select  your white balance.
Drive Mode - single shooting, continuous shooting, or self-timer options.
AF - Auto focus mode
Picture Style - allows you to select a pre-defined picture style, which will alter the color, saturation, contrast, and sharpness of your image.
SET - use to select the settings you want.
Preview - allows you to see the pictures or videos after you have taken them.
Delete - allows you to delete the pictures you don't want.


AF/MF - let's you choose to auto-focus or manual focus.
Image Stabilizer - helps reduce camera shake and blurring in pictures.
Focus Range - let's you know the focusing length that your camera is using.
Flash - This button with force the flash to pop up. Some shooting mode won't allow you to force the flash.
Lens Release - allows you to remove your lens from the camera.
Depth of Field Preview - allows you to view in real time the depth of field of your image.


So this is it for my quick take on the camera buttons. I hope this was helpful in some ways. I think my next project, would be to go over the shooting modes.


Canon Lens & Camera Compatibility + How to Mount Your Lens


This may seem like a silly post but believe it or not, that was not something I figured out until some time later after I had owned my camera. As a noob, at first, I used to just place the lens on the camera and just move it around until I feel like it's clicking, lol.


Well, the proper way to mount your lens is to connect the dots. Your Canon lens will have either a white square or a red dot.

Step 1. Align the dot or square from the lens to the camera
Step 2. Turn the lens clockwise until it stops and you hear a click. This means that it is locked.
Step 3. To remove your lens, press on the lens release button and turn your lens counterclockwise at the same time.


With that said, you may wonder what's the difference between the red dot and the white square.

EF (Electrofocus) lenses are mainly meant to be used on Full Frame bodies and comes with the red dot, whereas as EF-S is meant for use on Crop Sensor bodies (low to mid-range) which comes with the white square. If your Canon DSLR camera comes with both a red dot and white square, it means that it is compatible with both EF and EF-S lenses.

The only disadvantage of choosing an EF-S lens is that if you plan to upgrade to a full frame body camera, aka professional camera, then you will not be able to use the EF-S lenses.

Hopefully, I have not confused you. So to summarize what I just mentioned, Canon full frame bodies are only compatible with EF lenses. Canon crop sensor bodies are compatible with both EF and EF-S lenses.


Wednesday, December 19, 2012

Tis The Season To Be Jolly

Hello! You can actually see my reflection on the ornament holding the camera


What I love most about Christmas is the beautiful and colorful decorations but it's been a few years now that I've stopped putting up the Christmas tree and the lights. I don't even know what Christmas is all about anymore. I just know I'm broke as hell when Christmas rolls around. I get mixed emotions of happiness and sadness but one thing is certain, I always keep myself busy and distracted...A full time job, 3 kids, 2 blogs, and a shopping addiction...Damn, life is good (I think).

Anyways, my sister called me up last weekend and ask me to take some Christmas photos of her little family. Of course I said yes...I'm a noob who needs practice and friends and family is always a good start.

I made the mistake of arriving at her house without taking my tripod, LOL...I didn't even start and I failed already! But I'll make sure that this is on my checklist for next time. To be honest, I don't use the tripod very often cause it can get in the way but I've learned from this experience that I could've taken much better sharper pictures. Most of my pictures were a little fuzzy cause I couldn't keep a steady hand. 


As far as lighting, I had nothing fancy but gotta do with whatchu got, right? So it was pretty much just indoor lighting, some daylight coming through the windows and lights from the Christmas tree. I am hoping that in the next few months, I have a better lighting equipment for indoor shooting.

I thought I was shooting Raw, which is something I wanted to try, and again I failed, LOL. I did not get my settings right so I ended up shooting Jpeg. I'm definitely taking note as I learn from these stupid mistakes.
I find small children very difficult to photograph cause they can't stay still. Don't even talk about group photos because if one kid looks alright, the other is looking away or moving around. Photographing kids will take a lot of trials and errors for me to get it right.


By the way, this is Max, my sister's dog. He's a rat terrier. He's not very photogenic. He didn't want to even look at me or even pose. He just laid there minding his own business. I guess I should've offered some treats huh.

All these pictures were taken with Canon T3i, 50mm f/1.4 lens...Aperture f 1.6, Shutter Speed 1/20 sec, and 400 ISO.

At last, I managed to make the final touches on these pictures by fixing the light, contrast, and colors using Adobe Lightroom 4.2 and Photoshop 7.0. I say they look pretty decent. I'm still learning so I am hoping that in the next year or so when I look back at my older pix, that I see a significant change in the quality.

Happy Holidays! May you have a wonderful Christmas and Happy New Year.


Saturday, December 15, 2012

Photography Tips: Why You Should Set Your White Balance


I wished I had discovered this tip sooner but surprisingly, this is new to me, lol. Anyways, this is a tip that is so simple yet very effective and you will see a significant improvement in the quality of your pictures. Getting the right lighting is tremendously important when you want your pictures to look good. The second thing you need is knowledge of what you can do on the camera before you take the shot. If your picture is nearly perfect from the getgo, you will likely not have to do much editing afterward so prepping for the shot will save you a lot of time by improving the quality of your picture.

As you can tell from the picture above, the image on the left was taken in my bathroom under incandescent light and auto white balance, which causes the colors to look yellow. The image on the right has been color corrected by customizing the white balance. By the way, the images above were taken with my Sony Cybershot DSC-WX9. I think pretty much any digital camera on the market comes with this feature. Setting or customizing your white balance will remove the wrong colors or hues from your shot so that you get colors that are more accurate to what you see with your own eyes. Pretty amazing eh?!!! Believe me, I was stocked when I figured this out.

Please check your user manual on how to set/customize your white balance as there is variation within the brand and camera. But for now I'm just going to show you how I customize my white balance on the Sony Cybershot DSC-WX9 and Canon Rebel T3i so that you can see how simple it is to do. Heck, you may even figured out how to do that on your camera just by reading this.

Your camera will come with some factory set white balance options. The typical ones are auto, daylight, cloudy, fluorescent, incandescent, and lastly the custom white balance. You would use any of these to get the hues you want but my favorite of all of these is the custom. It will get you the most color correct possible, if that is what you are going for. Ok, I admit that auto white balance has been the option I've used 99% of the time within the past decade. Thinking about it, how many of you only use auto white balance? I'm willing to bet that unless you are a professional photographer or an amateur, you were probably using auto most of the time too.


For the Sony Cybershot DSC-WX9, go to Menu and select WB Auto and move your selection to the right until you reach the option that allows you to set your white balance. Once you are there, you must point your camera to something white, such as a piece of paper or whatever white you have under the lighting that you are in. Once you have your camera pointed to that white stuff, all you gotta do is press the set or selection button and your camera's sensor will auto correct the colors of your surrounding.

Back to the first picture above, notice the result I got on the right image from setting my white balance. All that yellowness is gone! It's so easy I'm actually mad at myself for not making use of this sooner. But if you were clueless like myself, you are going to love the results once you've figured out how to customize your white balance.


How to set your white balance on the Canon T3i:

1. Take a picture of a white piece of paper or surface, like pictured above.
2. Go to Menu and custom white balance
3. You'll see the white picture you just took, select it
4. A pop up window will ask you if you want to use the white balance from that image and you want to select OK.


5. When you are in your picture setting, you'll want to change the AWB (auto white balance)
6. Push the WB button on the right to go to custom white balance
7. And select it.


8. You know you have selected your custom white balance when you see that icon I circled in red above.
9. You can then return to your LCD screen live view or view finder to start shooting.


There is a little bit more steps involved with the T3i but it's not as complicated as it may seem and once you get the hang of it, you'll find it really easy. 

So there you have it...Simple and effective way of getting the right colors under any lighting you are in!

How many of you didn't know about this until now? If this is new to you, please try it and let me know how it changed your life...or your pictures, lol. I was saying to myself  "crap, all these good shots I could've gotten right with just manipulating my camera setting!"

Getting an expensive camera doesn't mean that all your pictures will come out perfect automatically. YOU, as the photographer, compose the image. The camera only does what you ask it to do.


Luuux Shared Link


Thursday, December 13, 2012

First Things You Should Get For Your DSLR Camera


If you are thinking about getting a DSLR camera, just bought one, or will be getting one soon, these are the first thing you will need.

1. A memory card. Sure you can still re-use the one you've been using with your digicam but I was told that you need a class 6 or higher for a DSLR camera. The class number is the number that you see inside the circle on the SD card. Here I have a class 10. The reason you want a higher class card is because it will process and transfer your files faster. Typically, files processed on a DSRL camera are much larger thus why the higher class is something to consider. Mine is pretty standard I think. I've seen some of these card being labeled as pro and they are much more expensive and faster but you won't need that unless you plan on filming HD videos. If your memory card doesn't process fast enough, what will happen when filming videos is that your camera will record for only a few seconds and then stop. When I bought this card it was on sale for only $8.00 at Best Buy.


2. A UV Filter.  Ok so I made the mistake of purchasing these filters on a whim at Wal-Mart and this set comes with a polarized filter and a UV filter. The polarized filter is supposed to reduce reflections and increase color saturation, whereas the UV filter is supposed reduce haze produce more vivid colors. Well at least that is what it said on the packaging. Meanwhile, these really do not increase the quality of your pictures, if anything, they can potentially even add more glare. But the reason you should still get it is to protect your lens from dirt, damage, and scratches. Lenses are expensive so you want to protect your investments. At Wal-Mart these two come as a set and cost me $20 but I found them for half the price on Amazon so I felt really stupid afterward. Oh well, just don't do what I did, lol. Save yourself a few bucks and order it from Amazon. The one I always keep on my lens is the UV filter. Since it can easily catch glare from the light at certain angle, you want to pay extra attention to that when shooting.


Luuux Shared Link


Monday, December 10, 2012

Fall Portraits


This is my second shoot and I did it in October. The leaves were falling fast so I had to hurry and snap a few pictures before the wind blew them all away. I used my Rebella and the kit lens. Pictures weren't the greatest but the editing part gave them so much more life. My models are my daughter and my nephews. These were taken about 4 or 5 pm. I like the pictures where you can see the sun and the shadows of the trees. It adds a warm glow to the images.

I was still new and experimenting with my camera. I must say that I've learned quite a bit in the past couple months. So I have quite a few things to share with you.


Sunday, December 9, 2012

Photography Terminology


Please excuse my makeup-free face since this is not a makeup post, but I hope you like the Hello Kitty frames ^_^ 

After I have gotten my DSLR camera, I started reading more about photography and I've come across a few "technical" terms that I was not familiar with. These are terms you should get familiar with if you are into photography.

AF - auto focus. The lens will automatically focus on the subject.

Aperture - the opening of the lens that allows the light to come through. It is measured in "f" numbers. The smaller the "f" number the wider the opening.

Bokeh - out of focused blurred areas.

Crop sensor camera - a camera with a smaller sensor.

Chromatic aberration - also known as "purple fringing", color distortion caused by the lens inability to bring the various colors to the same focus point. You can see an example HERE.

Depth of field - the areas that are in focus.

DSLR - digital single lens reflex

Exposure - the amount of light that the camera sensor captures.

Focal length - the distance between the lens and the camera's sensor.

Full frame camera - a camera with a larger sensor. They offer better image quality, are better for shooting wide angle, and are more expensive. This is a really good post that will explain the difference between a crop sensor camera and a full frame camera. Click HERE to read.

Glass - another term for lens

JPEG - a format for compressing images.

IS - image stability. A feature in a lens that reduces motion blur. 

ISO - camera's sensor sensitivity to light.

Macro - close up photography.

Noise - the graininess in an image, usually caused by a high ISO setting.

Prime lens - a lens with a fixed focal length. They offer the best imagine quality and are usually faster. The only disadvantage is that you will have to physically move closer or further in order to get the the shot you want.

Raw image - actual data captured by the camera's sensor. They are also considered as the "image negatives". Because they have not been processed by the camera, the files are much larger. Raw files also come out much nicer after editing.

Shutter speed - the length of time that the shutter remains open

Vignetting - darkening on the outer edges of an image.

Zoom lens - lens with a variable focal length.


Saturday, December 8, 2012

My First Portrait Session


So I did my first portrait session back in September of this year with my Rebella and her kit lens, which was all I had at the moment. The models in my first portraits are no other than my children. Well, that's a great way to start, don't ya think?

The purpose of this session was for my son's senior picture. He will be graduating from high school in 2013. Makes me feel old when I think of it. I did not want to pay someone to take the photos so I promised him that I will be his photographer and save us a few hundred bucks.

The location was at Grant Park in Milwaukee, Wisconsin. We didn't travel too far to get there. That's like a 15 minute drive from home. We got there around 3 pm. It was a rather nice day out. Temperature was mild and partly cloudy sky. 

Pictures taken by the lake were rather difficult to take. The entire area that we were are was in the shade but it was really bright out. And pictures came out best with the flash. It was also very windy so blowing their hair all over the place.


My daughter, who is 15, tagged along and I also took some pictures of her which also turned out quite nice.
The original pictures were rather dull looking but after editing, they turned out pretty decently good. It would have been nicer if I had a better lens but I guess that's not too shabby either. Still turned out better than I expected.